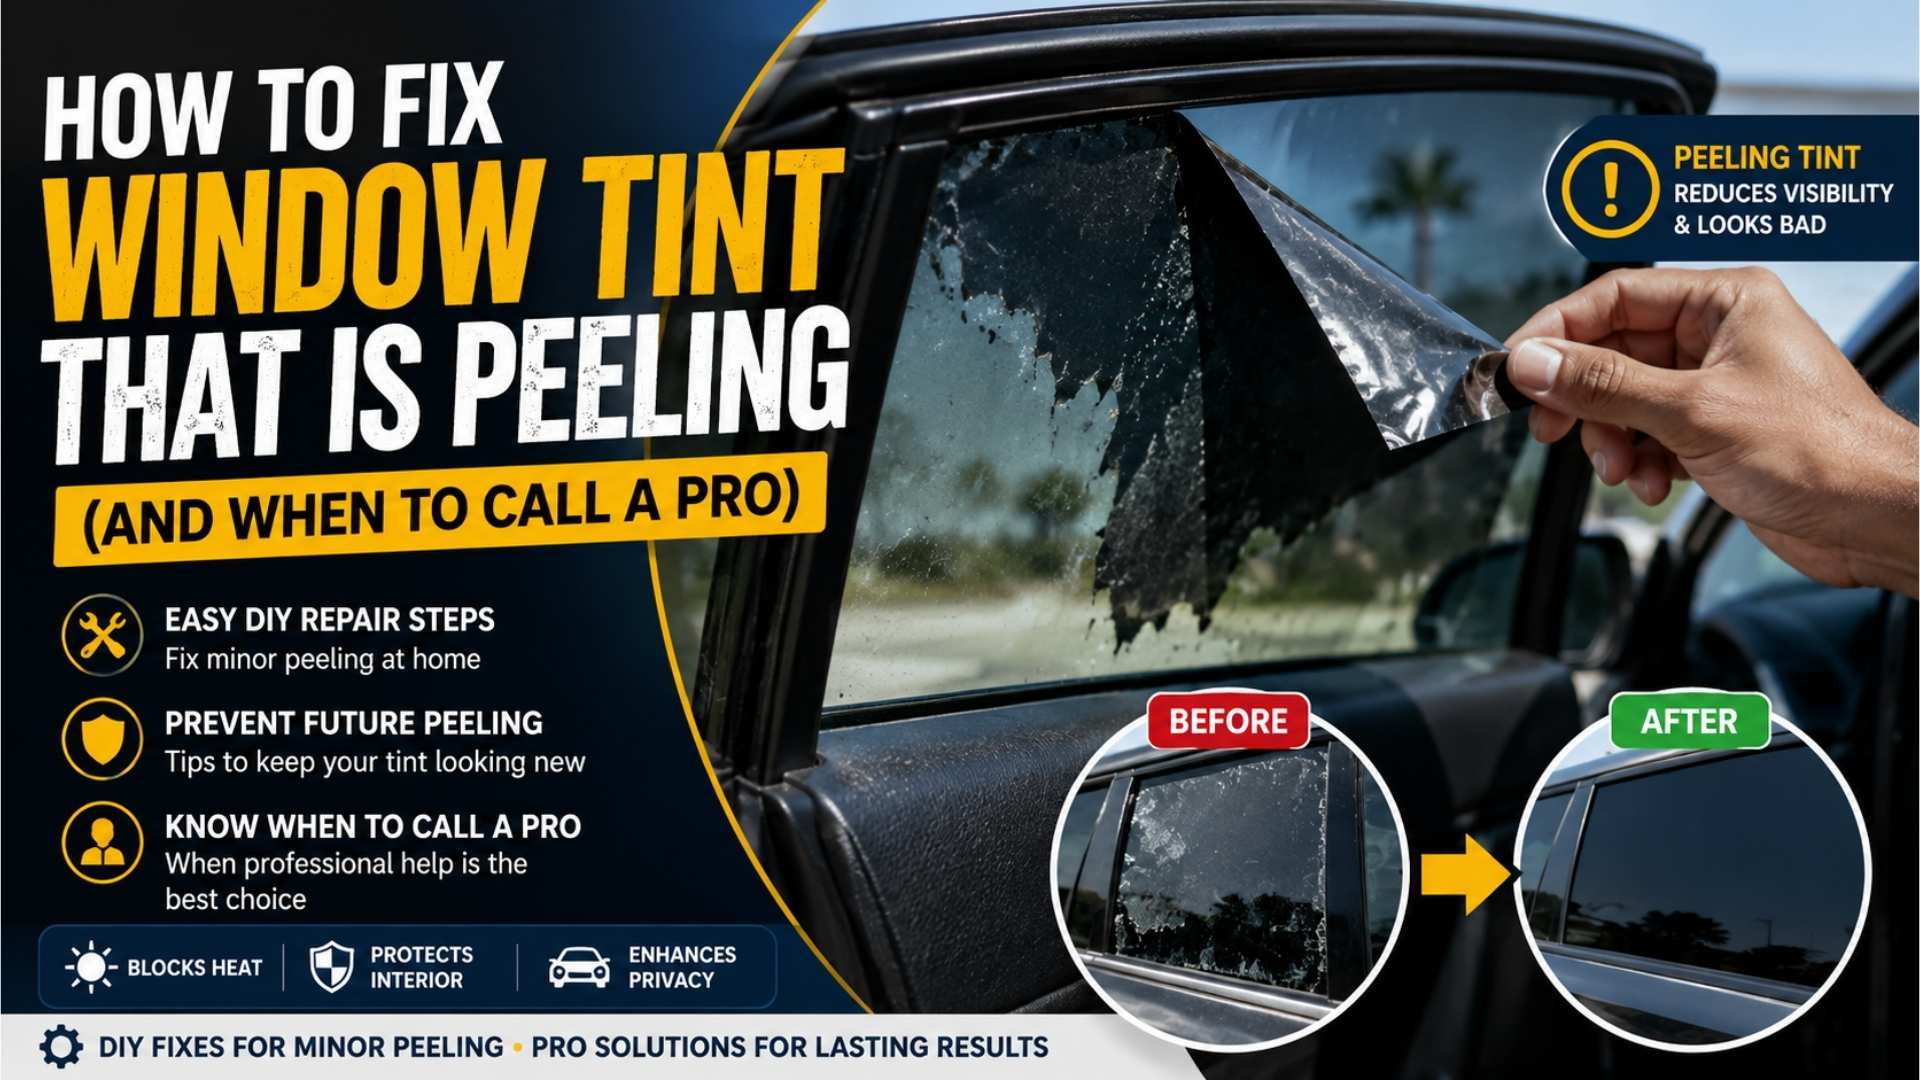
Peeling window tint is one of those things that starts small — a tiny bubble at the corner, a barely-noticeable edge lifting — and then snowballs fast. Once tint begins to separate from the glass, it rarely stops on its own. Before you know it, you’re driving around with a patchwork of flaking film that blocks your sightlines and makes your car look neglected.
The good news: depending on how far along the peeling is, there are legitimate fixes. The bad news: most of them are temporary if the root cause isn’t addressed. This guide walks you through why tint peels, what you can actually do about it yourself, and when DIY stops being worth it.
Why Does Window Tint Peel in the First Place?
Understanding the cause is the first step to knowing the right fix. Tint doesn’t just randomly decide to let go — something always triggers it.
Age and UV Degradation All window tint films have a lifespan. Entry-level dyed films typically last 3–5 years before the adhesive begins to break down from constant UV exposure. When the adhesive fails, the film lifts. This is the most common cause of peeling in older vehicles.
Poor Installation If a tint job was rushed or done in a dusty environment, the adhesive bond was compromised from day one. Contamination between the film and glass — even a single dust particle — creates a weak point that eventually becomes a bubble, and bubbles become peeling edges.
Low-Quality Film Cheap films from big-box stores or bargain installers often use inferior adhesives that aren’t designed to handle prolonged heat exposure. In climates like the San Fernando Valley, where cars regularly sit in 100°F+ heat, that adhesive breaks down fast.
Improper Cleaning Ammonia-based cleaners (like standard Windex) are one of the leading causes of premature tint failure. Ammonia degrades the film’s adhesive layer over time. If someone has been cleaning the inside of your windows with the wrong product, the tint will eventually pay the price.
Physical Damage A sharp object dragged across the glass, a seatbelt buckle repeatedly swinging into the window, or even fingernails near the edge can nick the film and give peeling a place to start.
Assessing the Damage: Is It Worth Fixing?
Before grabbing a heat gun or running to the auto parts store, take an honest look at the situation.
Minor peeling — a small lifted edge, one or two isolated bubbles near a corner — is genuinely fixable at home, at least as a short-term solution.
Moderate peeling — large sections separating from the glass, widespread bubbling, or film that’s turned purple or hazy — usually means the adhesive has failed across a significant portion of the window. Patching it will look terrible and won’t last.
Severe peeling — film coming off in strips, multiple windows affected, years-old tint — at this point the film needs to come off entirely. Patching old, degraded film is a waste of time and money.
Be honest with yourself here. It’s tempting to try to save the tint, but if it’s past its prime, the real fix is a fresh installation.
How to Fix Minor Peeling Window Tint at Home
If the damage is genuinely small and isolated, here’s how to address it properly.
What You’ll Need
- A heat gun or hair dryer
- Tint-safe adhesive (specifically designed for window film — not super glue)
- A soft squeegee or credit card wrapped in a microfiber cloth
- Clean microfiber cloths
- Spray bottle with a mixture of water and a few drops of dish soap
Step 1: Clean the Area Thoroughly
Before doing anything else, clean the inside of the window with a non-ammonia cleaner. Any grease, dust, or residue under the lifted film will prevent the adhesive from re-bonding. Let it dry completely.
Step 2: Gently Lift the Peeling Edge
Carefully lift the peeling section of film just enough to work underneath it. Don’t force it — if it’s resisting, apply gentle heat first to soften the adhesive layer. Go slowly. Tearing the film while trying to fix it makes everything worse.
Step 3: Apply Heat
Use a hair dryer or heat gun on a low setting to warm the film and the glass underneath. This softens the old adhesive and makes the film more pliable. Keep the heat source moving — holding it in one spot can warp the film or the glass trim.
Step 4: Apply Fresh Adhesive
Using a tint-safe adhesive (available at auto parts stores — ask specifically for window film adhesive), apply a thin, even layer to the underside of the lifted film. Less is more here. Too much adhesive creates new bubbles.
Step 5: Press and Smooth
Gently press the film back down against the glass, starting from the center of the lifted area and working outward toward the edges. Use your squeegee or wrapped credit card to push out any trapped air or adhesive. Work slowly and methodically.
Step 6: Apply Heat Again to Set
Once the film is pressed flat, apply light heat over the repaired area for another 30–60 seconds. This helps the adhesive cure and bond properly.
Step 7: Let It Cure
Leave the window alone for at least 24–48 hours. Don’t roll it down, clean it, or touch the repaired area. The adhesive needs time to fully bond.
What NOT to Do
A few things that seem logical but will make the problem worse:
Don’t use super glue or household adhesives. They aren’t flexible, will create visible lumps, and can permanently damage the glass or film.
Don’t skip cleaning the glass first. Reattaching film to a dirty surface just encapsulates the contamination and guarantees it peels again.
Don’t use excessive heat. Too much heat will shrink or warp the film. Low and slow is the right approach.
Don’t try to patch over peeling film with a new piece. The edges will never align invisibly, and you’ll end up with an obvious double-layer patch that looks worse than the original problem.
Don’t use ammonia-based cleaners going forward. Once you’ve repaired the tint, switch to an ammonia-free window cleaner permanently to protect the adhesive.
Removing Old Tint: When the Film Has to Go
If the damage is widespread, the smartest move is full removal and reinstallation. Attempting to patch severely degraded tint is like putting a band-aid on a problem that needs surgery.
Removing old tint yourself is possible, but it’s messy and time-consuming. Here’s the basic process:
The Ammonia Method: Cover the outside of the window with black trash bags (to trap heat), spray the inside surface liberally with an ammonia-based cleaner, cover it with plastic wrap, and let it sit in the sun for an hour or more. The heat and ammonia work together to loosen the adhesive. Then peel the film slowly and scrape off remaining adhesive with a plastic razor blade.
The Heat Method: Use a heat gun to warm sections of the film and peel it away gradually. Work in small sections. Follow up with adhesive remover to clean the glass.
Both methods require patience. Rushing tint removal leads to adhesive residue left on the glass, which is its own problem to deal with.
One honest caveat: if your vehicle has a defroster grid on the rear window, be cautious. Aggressive scraping or excessive heat can damage the defroster lines, and that’s an expensive repair.
When a DIY Fix Isn’t the Right Answer
Home repairs work for small, isolated issues on relatively new tint. But there are situations where a professional reinstallation is clearly the better path:
- The tint is more than 5–7 years old
- Peeling is happening on multiple windows
- The film has turned purple, hazy, or has significant scratching
- You drive a luxury vehicle, EV, or a car with complex curved glass
- The peeling is near or affecting the rear defroster grid
- You want a result that actually looks good, not just functional
In these cases, the cost of a professional re-tint is almost always lower than the time, frustration, and subpar results of trying to patch aging film.
The Long-Term Fix: Quality Tint, Properly Installed
Peeling tint is almost always the downstream consequence of either cheap film, rushed installation, or both. If you’re replacing tint, it’s worth investing in quality the second time around.
Premium ceramic films from reputable brands are engineered with adhesive systems designed to last a decade or more — even in extreme heat. They don’t bubble, they don’t turn purple, and they don’t peel unless something physically damages them. The upfront cost is higher, but the total cost of ownership over time is significantly lower than replacing budget film every few years.
Equally important is choosing an installer who takes the preparation process seriously — cleaning the glass meticulously, working in a dust-controlled environment, and taking the time to do it right rather than fast.
Bottom Line
Small peeling edges on otherwise healthy tint? Clean the area, use proper tint adhesive, apply heat, and smooth it out carefully. That’s a legitimate repair that buys you time.
Widespread peeling, old film, or multiple windows affected? Stop patching and get it replaced. The money and effort you’d spend on repeated temporary fixes will cost more in the long run than one quality re-installation.
If you’re in the Van Nuys or San Fernando Valley area and you’re ready for a fresh start, Tint & Wraps Customs specializes in professional window tinting using premium films that are built to last. Their team can remove your existing tint cleanly and install a new film that won’t have you peeling corners six months from now. Reach them at (747) 295-7683 or visit the shop at 7812 Gloria Ave, Van Nuys, CA 91406.