Have you ever seen those series of letters and numbers on your car’s dashboard and had no idea what they meant? That little string of text is called an engine code, and it’s essentially a shorthand way for mechanics to diagnose problems with your vehicle.
In this blog post, we’ll break down what each part of an engine code means and teach you how to read them like a pro. So, next time you see an engine code staring back at you, don’t be intimidated – just take a deep breath and dive in!
What is an Engine Code?

To the untrained eye, an engine code looks like a jumble of random letters and numbers. But to a mechanic, it’s a valuable diagnostic tool. ECU $07e8 codes are generated by the computer in your car when it detects an issue with the engine. The code provides a snapshot of what the problem is and where it’s located.
However, interpreting engine codes can be tricky. That’s because there can be multiple codes for the same issue, and some codes may apply to more than one car. This is why it’s important to learn how to pinpoint a problem by reading engine codes.
What is an OBD System?
OBD systems are onboard diagnostic systems that help vehicle owners troubleshoot problems with their cars. OBD systems have been required in all new petrol cars since 2001 and in all-new diesel cars since 2003.
OBD systems work by monitoring the performance of a car’s engine, transmission, and other key components. When something goes wrong with a car’s engine, the OBD system will generate a “trouble code” that can be used to diagnose the problem. OBD systems can also provide important information about things like fuel efficiency and emissions levels.
In short, OBD systems are an essential tool for keeping cars running smoothly.
What is a DTC?
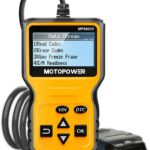
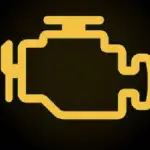
Diagnostic trouble codes, or DTCs, are five-digit codes used by a vehicle’s computer system to identify and describe an issue. When a problem is detected, the computer system will store the code and turn on the check engine light. DTCs can be accessed using a code reader, which can be purchased at most auto parts stores.
Once the code is retrieved, it can be looked up in a DTC database to find out more information about the problem. This can be helpful in troubleshooting, as it can provide clues as to what component may need to be replaced or serviced. In some cases, the problem may be something as simple as a loose gas cap, so it’s always best to check for DTCs before taking your vehicle in for repairs.
Comparison of OBD to DTC
If you own a vehicle built-in 1996 or later, it likely has an On-Board Diagnostics (OBD) system. OBD systems are built into every vehicle to monitor its performance and report any issues. If something goes wrong, the system will generate a Diagnostic Trouble Code (DTC). DTCs are used by mechanics to identify what needs to be fixed.
However, OBD systems can also be used by drivers to get real-time information about their vehicle’s performance. This can be helpful for troubleshooting issues yourself or monitoring your vehicle’s performance over time. While DTCs and OBD systems are similar, they serve different purposes. DTCs are used to diagnose problems, while OBD systems are designed to provide information about a vehicle’s performance.
Inserting and Reading an OBD Scanner
Step 1: Locate your vehicle’s OBD port.
The OBD-II port is required by law to be within 3 feet of the driver’s seat. It’s usually mounted on or near the lower dash on the driver’s side, and it has a 16-pin female connector with a trapezoidal shape.
You may need a flashlight to see it, as it’s often recessed into the dash. Once you’ve found it, gently tug on any exposed wires to make sure it’s not loose. If everything looks good, you’re ready to connect your OBD-II scanner and start diagnosing any issues with your vehicle.
Step 2: Plug the OBD scan tool
The OBD connector is a male tool that fits into the OBD-II system. It is important to note that the OBD connector only fits one way. If you are having trouble fitting it in, make sure that you are orienting it the correct way.
Step 3: Go through the codes in the computer
To read codes from your OBD-II system, simply navigate to the “read codes” section of your computer. From there, you’ll be able to see any codes that have been generated by the system. You can then use these codes to troubleshoot the problem and determine the best course of action.
Step 4: Record the codes
If you’re troubleshooting your vehicle’s OBD-II system, it’s important to record all the error codes that are displayed. Make sure to write the codes down in the order that they’re shown by the scanner. This will help you narrow down the potential causes of the problem.
Step 5: Break down the code into characters
Every OBD or DTC code is composed of four sections that each pertain to a specific parameter of the vehicle. The first character is the most important as it tells you what system in the vehicle is malfunctioning. The second character narrows down the location of the problem. The third character identifies the specific component that is causing the error, and the fourth character warns of any potential consequences.
Step 6: Find out the meaning of the letter
The first character of an OBD-II code is a letter that indicates the system where the problem was detected. An OBD-II code can display any one of four letters. “P” means powertrain and indicates problems regarding the engine. “B” infers to body failures such as bodybag failure. Then again, “C” refers to chassis-related problems, and “U” indicates network communications failure.
It’s to be mentioned that only the top-end scanning tools can detect “B”, “C”, or “U” codes.
Step 7: Determine if the codes are Society of Automotive Engineers (SAE) codes or manufacturer-specific.
The second character of the OBD-II code is used to indicate whether the code is a Society of Automotive Engineers (SAE) code or a manufacturer-specific code. SAE codes are indicated by characters 0 and 3, while manufacturer-specific codes are indicated by characters 1 and 2.
However, there are some exceptions to this rule, so it is always best to check with your vehicle’s manufacturer to be sure. Once you know which type of code you are dealing with, you can proceed with the appropriate troubleshooting steps.
Step 8: Determine which system the code applies to.
The third character of an OBD code indicates the type of system or subsystem that is affected.
- A “1” means there is a problem with the air or fuel flow. You could be facing something like a mass airflow sensor issue if you find this code.
- A “2” refers to an issue with how fuel or air is being injected. This might be a problem with a fuel injector.
- A “3” is an ignition-related problem. These usually refer to cylinder misfires.
- A “4” has to do with the emissions system. Catalytic converter problems usually trigger this code.
- A “5” is a problem with the speed controls or idle control system.
- A “6” is an issue with the computer output circuit. This could be something like an internal computer failure.
- The numbers 7 to 9 all mean there is a transmission-related problem. This could be something like a pressure fault or sensor failure.
Step 9: Determine the exact fault.
The final number in the code defines the exact problem you’re experiencing. The numbers can range from 0 to 99. These numbers help the user figure out the exact problem of their vehicle so they can be handled accordingly.
You can find out what the codes mean by asking your dealer or looking up the meaning in a list of DTCs. Some codes are specific to certain vehicles.
Conclusion
So, there you have it! After reading this article, you should now have a better understanding of what engine codes are and how to read them. Hopefully, you’ll never have to deal with any engine code problems, but if you do, at least you now know how to diagnose the issue yourself.
Not only will this save you a trip to the mechanic, but it will also give you a better understanding of what’s going on under the hood of your car. So go ahead and take a look at those engine codes – you just might be surprised at what you find.


