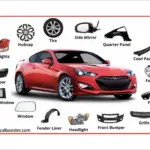
Also known as ‘weather seals’ or ‘weatherstrips’, rubber seals prevent outside elements such as rain, snow, wind, and critters from getting inside your vehicle. They also help keep your doors closed, your trunk sealed, and your windows wound tightly.
To ensure their longevity and usefulness rubber seals require regular maintenance.
Why do the Rubber Seals Need Maintenance?
Over time, your vehicle’s seals breakdown from constant opening and closing of doors and windows, and of course the inevitable wear and tear of time and of the elements.
Because weatherstrips are designed to eliminate water leaks, wind noises, rattles, and limit metal-on-metal contact, they’re vital for the overall longevity of your car or van. With around a quarter of all cars in the U.S. at least 16 years old, maintaining even the smallest parts can help keep it road safe and comfortable.

Use the Right Products
When maintaining your car’s rubber seals, you should never use a water-based product because water gets into the seals. When temperatures drop below freezing the frozen water expands and causes cracks. Instead, use products like Vaseline or Silicone.
Remove Dirt and Moisture
Before starting any actual maintenance on your car’s seals, you’ll want to remove all dust, dirt, and of course moisture. This is essential as the care products will only be absorbed into the rubber when they’re clean and dry.
You should treat your rubber seals once a month and seals in the engine compartment should undergo thorough maintenance at least once a year.
If your rubber seals are beyond the point of maintaining, they should be replaced at the first sign of wear. You could start to experience wind noise, leaks, or other problems – so you really shouldn’t delay.
Replacing Your Seals
When it’s time to replace your seals, there are few simple steps to follow.
- Remove the rubber with a flathead screwdriver – Gently ease the rubber out. If it’s soft it will break into pieces. Make sure that every piece has been removed.
- Scrub the glue with WD-40 – Ensure no glue residue is left behind by using a WD-40 multi-use spray.
- Sand the metal – Use fine-grit sandpaper to create a clean and even surface
- Apply new adhesive – Use a weather stripping adhesive to bond the rubber with metal. Lay down a thin layer of the adhesive in the seal and a bead of it inside the rubber.
- Put in the new rubber seals – Allow the adhesive to become tacky then stary laying the seals from one corner. Applying slight pressure.
- Protect with WD-40 – Using WD-40 specialist silicon lubricant along the rubber seal will help protect the rubber parts from attraction dust and prevent moisture.


